Aluminum Fence Installation | The iFence Check-list
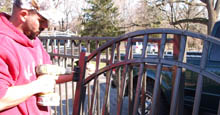
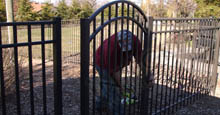
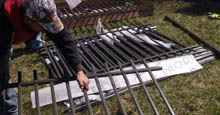
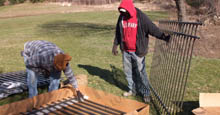
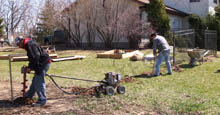
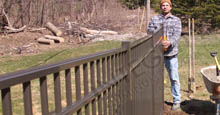
Do these guys look stressed? Integrity™ Aluminum fencing is perhaps the most installer-friendly fencing there is! Though durable, aluminum posts are not as large as say, 4x4 or even 5x5 monster posts often used for wood or vinyl fencing, so digging the holes is made easier. The pre-assembled and gentle-on-the-back panels enable the project to move along efficiently. With only a short list of tools needed, you'll be amazed at how well you'll do! Also remember that our installation consultants are always only a phone call away to all of our customers, even on weekends!
1.) Tools and Supplies Needed
- Hand diggers and power digger
- 100' tape measure
- Level
- Pliers and tin snips
- String line and wood or metal stakes
- Power hacksaw
- Screw gun and Phillips head tips
- Hammer and rubber mallet
- Wooden blocks to hold fence in place until concrete hardens
- Cement mix
2.) Before you Begin...
One small note before you begin. An average project is about 10 to 20 hours. If the sun is setting on a Sunday night and you just want to ''get it over with,'' STOP. An extra hour after work on Monday or the following weekend is well worth the wait. Your Integrity™ fence will last for decades. But so will the crooked post against the house. Pace yourself. Be patient. Measure twice, cut once. You'll be glad you did!
3.) Prepping the Work Site
Identify underground utility lines

Be sure that all potential underground utility lines have been identified and marked by the utility company. This can be a life and death matter!
Be aware of property lines

Be sure that you are aware of your property lines. If you are not certain about your property lines, it is advisable to have your property surveyed before installing a fence. You are ultimately liable for its location!
Walk the area
Walk the area to be fenced. Check for pool equipment and utility lines. Typically, a utility company does not mark private underground lines. If you are not 100% certain, contact your pool installer for assistance (it's a good idea to have him mark all underground lines before his final departure).
Unpack and review packing list
Unpack boxes and crosscheck all of your materials with your packing list. Doing this will ensure that everything that you need is present.
Earmark types of panels
If there are areas with a grade slope, identify and earmark your rackable panels for use in these areas before you begin!!
String the line
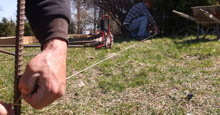
You are now ready to begin. First, hammer wood (or metal) stakes into place and run a string along the entire line of fence. Make it taut.
4.) Installing the Fence
Mark where to dig your post holes
Mark the location of the post holes on-center. The key to running a straight and true fence is for the post holes to line up with the string line. If you have 2'' posts, use 72-1/2'' on-center measurements for installing 6' wide panels of Residential grade fences, John Russell Designer™ grade fences, and Premier™ grade commercial fences. Use 72-1/2'' on-center for 6' wide panels of Ultimate™ grade commercial fences being installed with 2.5'' posts. Adjust accordingly for wider or narrower panels and/or posts. Measure all panels twice and cut once as panel sizes are nominal, not exact. Don't worry if you run into spacing problems. Any fence panel may be cut to fit.
The string will be your guide
The string you have already staked out will be your straight edge reference point until your project is completed! You will place all of your posts about a 1/4 inch, 1/2 inch or 1 inch from the taut string. It doesn't matter what you decide. It matters that you stay consistent. IMPORTANT: Never let a post (or anything) touch or push against your string, otherwise you will interfere with the continuity of your fence line.
Dig a few holes at a time
Dig 6'' wide holes between 24'' to 42'' deep, depending on your part of the country. Set your post in the hole. Generally, your first post should be at a termination point, such as up against your house. You do not have to pre-dig all of your holes. It is okay – better, in fact – to dig as-you-go, perhaps just a few extra holes at a time. It's a good idea to install your gate posts first. With your posts installed plumb and true, the setting concrete will better support the fence panels. Just remember to check on them to be sure they remain perfectly positioned and level until the concrete sets. If they are out of position, the gate may not function.
Installing a panel is quick and easy
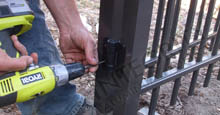
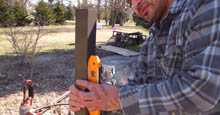
Start by attaching one section of fence to the post by sliding the notched horizontal rails of the fence panel into the punched holes of the post. Then put a 1'' self tapping screw through the side of the post and into the rail within the post to securely attach rail to post.
Always level each post
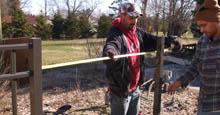
Level each post and pour your mixed concrete into the hole. Posts should always be leveled off of your string line reference point. Never jump ahead. Always place one panel and one post at a time. Leave the concrete 3-4'' below grade. Place some dirt on top of the hole and pack it tight. This will help hold the fence level. Place a 2'' block under the fence panel to hold it at a consistent 2'' above grade. For this, you can use pieces of wood or paver bricks.
Set the gate opening
For staking out your gate, follow these recommendations: The width of a gate refers to the width of the opening between the gate posts (inside-to-inside, not distance on-center). If you have a 4' single gate, set posts for a 4' opening. If you have a double gate, set the opening according to the gate size. For example, if you have an 8' double gate, set posts for an 8' opening. The gate should swing out and away from area to be enclosed by fence. Always make sure that you have clearance to completely open the gate without obstruction.
Go back and tweak
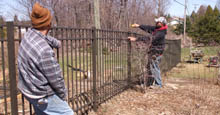
As you move along, go back and level the already installed panels. Posts may shift until the concrete has set.
Use your sight to determine adjustments
Using your sight, a level, and the reference point string, ''tweak'' the posts in and out and up and down. If you are following the grade, stand back along the fence and adjust the fence up or down to flow with the grade.
Corner Posts

If your line ends with a corner, the horizontal rails of the next panel must be notched to fit the post. (
See diagram)
Snap the caps into place

When all panels have been installed and cement around posts is fully set, install the post caps by snapping them into place. They do not require screws! A rubber mallet may be helpful but is not absolutely necessary. Just be careful not to damage the material.
Time for the gate
After you have installed all of your fence panels, and have leveled the gate posts, it's time to hang the gates.
5.) Installing the Gate(s)
Preparing to attach the gate
After you make sure your gate posts are level and the cement is fully set, confirm the direction of the swing and bring in the gate!
Install the hinges
Install hinges on the gate posts first. Use 1'' long self tapping screws. Center the gate in the opening and put only one screw in each hinge. This is to allow for some final adjustment. If installing self-closing hinges, adjust tension in the hinges for a proper swing rate.
Install the gate latch
Now install the gate latch per the included instructions.
Putting in the remaining screws
If the gate swings properly, put the remaining screws in the hinges. Do not use the gate until the cement fully sets.
Should You Have Questions...
Installation consultants are available to all customers who have purchased their fence from iFenceUSA!™ This service is accessible to our valued customers or any agent they have contracted to install their Integrity™ fence!
 Check-list
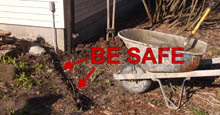
 Be sure that all potential underground utility lines have been identified and marked by the utility company. This can be a life and death matter!
 Be sure that you are aware of your property lines. If you are not certain about your property lines, it is advisable to have your property surveyed before installing a fence. You are ultimately liable for its location!




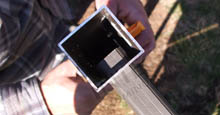
 If your line ends with a corner, the horizontal rails of the next panel must be notched to fit the post. (See diagram)

 When all panels have been installed and cement around posts is fully set, install the post caps by snapping them into place. They do not require screws! A rubber mallet may be helpful but is not absolutely necessary. Just be careful not to damage the material.
